TSS Animator®
It’s alive!
Created from engineers for engineers.
Animator® gave motion to Autocad!
How it works
As soon as you have installed TSS plugin ANIMATOR in your computer there is a variety of actions that can be done. The real benefits using ANIMATOR become mostly obvious when applied on Railway projects
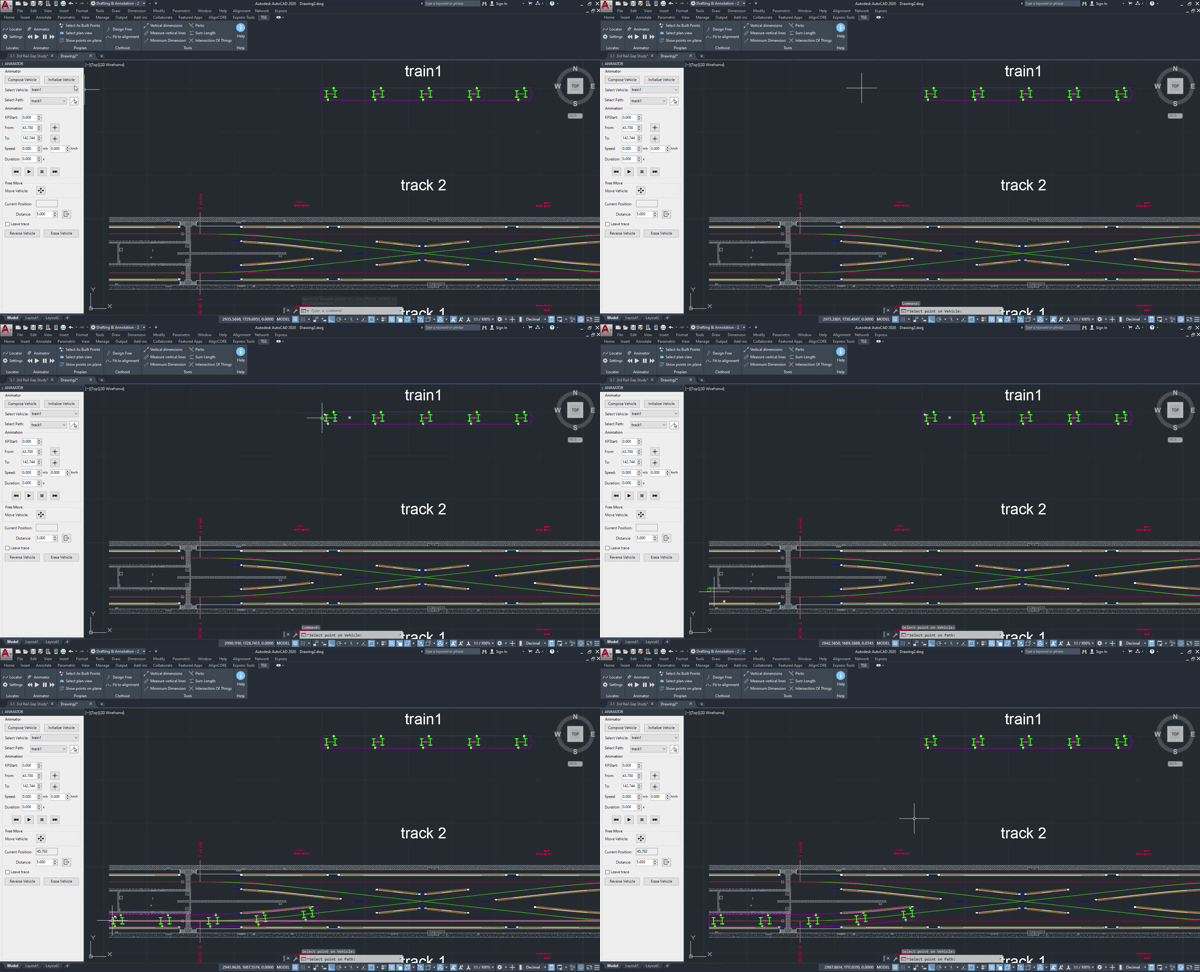
Select the vehicle
-
Firstly, compose a vehicle of your choice. ANIMATOR will ask you to select the wagons, the axles, the rotation points and (if desired) the pen points which are points on vehicle that you want to check/draw their position along the movement. The geometry of the vehicle will be saved in the drawing so as not to compose it again after reopening it.
You can create as many vehicles as you like.
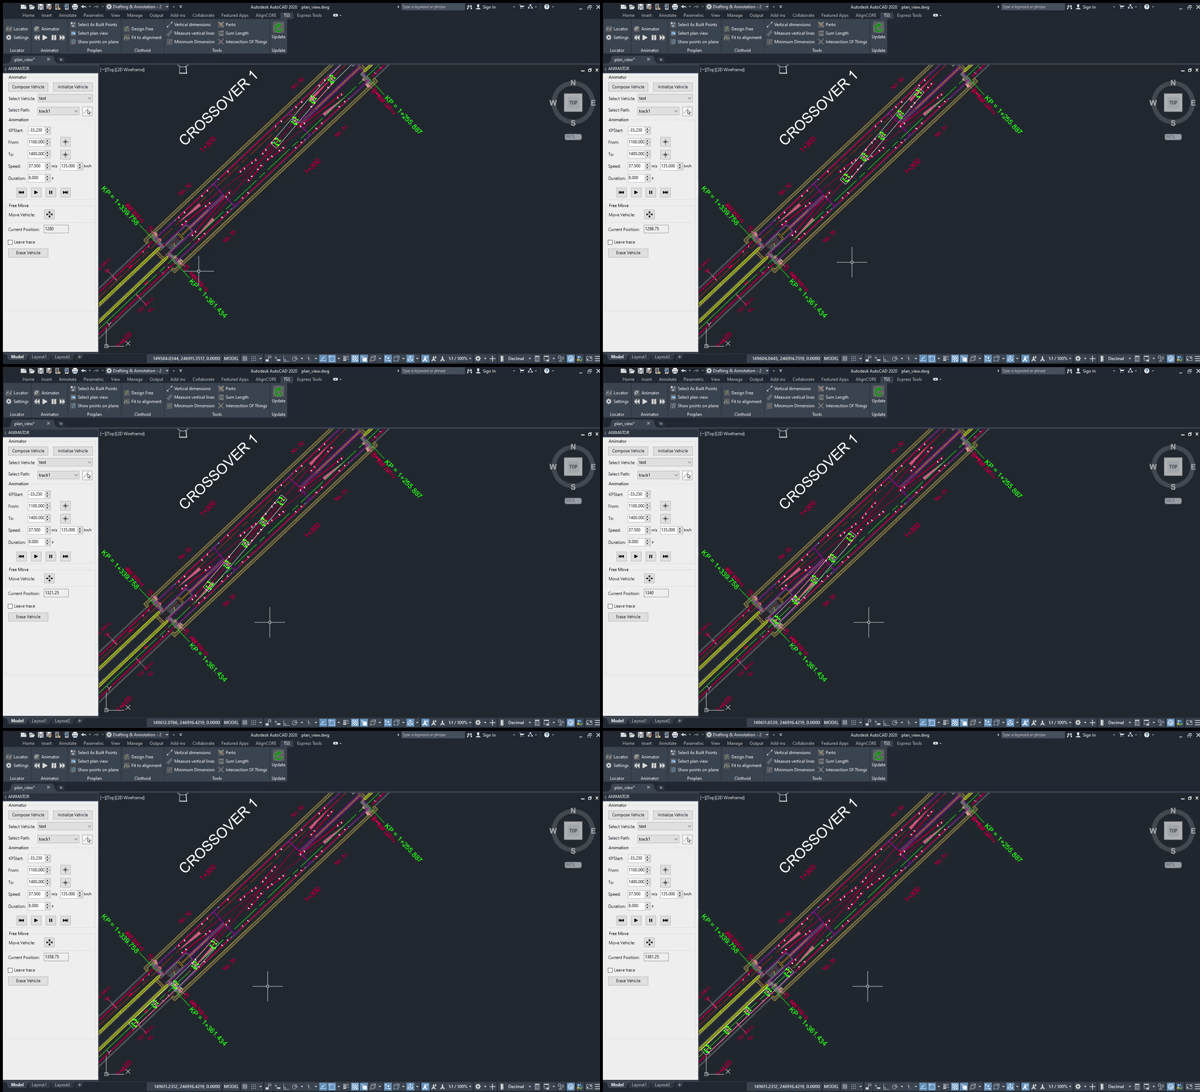
Select the axis to work on.
-
Then select the Pathway that this vehicle will move through. You can select as many AutoCAD entities as you like as Pathways and they will all be saved in the drawing so as not to select them again.
Initialize the vehicle at any position along the selected axis. Select a point on vehicle and a point on path and ANIMATOR will place that point on vehicle on the selected point on path.
What is Animator®?
ANIMATOR is a plugin for AutoCAD and Civil3D. These are all Autodesk Products and Trademarks.
Due to its nature as a plugin, ANIMATOR is designed to work on AutoCAD drawings.
With ANIMATOR you are able to simulate a vehicle’s movement along an Axis.
What can Animator®
do for you?
As soon as you have installed TSS plugin ANIMATOR in your computer there is a variety of actions that can be done. The real benefits using ANIMATOR become mostly obvious when applied on Railway projects. ANIMATOR becomes really handy every time there is a need to simulate a vehicle’s movement along a pathway and check/measure multiple parameters, necessary for many railway studies. (Gauge Control, Conductor Rail Gap Studies, Vehicle’s interface with other elements etc.) For example, you give the final position of a specific point on vehicle and ANIMATOR will place the vehicle along the pathway, so as to detect clashes and interfaces with other objects in surrounding area. The Pathway in AutoCAD terminology is defined as the Polyline. The Polyline or the Alignment will become the working Path for ANIMATOR. As soon as you define your vehicle and the working Axis, ANIMATOR will help you move that vehicle along that axis. The accurate position and rotation angle of the vehicle will automatically be calculated provided that the axles move continuingly transversal to the selected path.
![]()
Firstly, compose a vehicle of your choice. ANIMATOR will ask you to
select the wagons, the axles, the rotation points and (if desired) the
pen points which are points on vehicle that you want to check/draw
their position along the movement. The geometry of the vehicle will
be saved in the drawing so as not to compose it again after reopening it.
You can create as many vehicles as you like.

Then select the Pathway that this vehicle will move through.
You can select as many AutoCAD entities as you like as Pathways
and they will all be saved in the drawing so as not to select them again.

Initialize the vehicle at any position along the selected axis.
Select a point on vehicle and a point on path and ANIMATOR
will place that point on vehicle on the selected point on path.

Finally, move the vehicle along the pathway using 1 of the following scenarios:
i) Free move: Select a Base Point and move the mouse cursor along the axis.
The selected vehicle with follow the projection of your cursor position on the pathway.
ii) Animation: Select a starting KP location, an ending KP location and the duration
of the animation (or the desired speed of the vehicle) and press play.
The animation with start and the vehicle will automatically move along
the selected axis. You can pause, move backwards and forward the animation.
iii) Move at given distance: Select a distance to move the vehicle
from its position on axis. Note that distance can be either negative or positive.

Vehicle’s current Kilometric Position along the axis
will be calculated and displayed on a textbox as it moves.

If needed, ANIMATOR may reverse the designed vehicle.

You may erase the designed vehicle by pressing a button.

Check the option “leave trace” and ANIMATOR will calculate
the selected pen points along the axis and draw polylines
that pass through them during animation
Animator® in a glance
POINT ONE: Compose a vehicle and Select Pathway
On Animator Palette the user clicks on “Compose Vehicle” button in order to define the geometry of the desired vehicle. Animator will ask you to give a name to the vehicle and select from drawing its wagons, axles, rotation points and pen points. In addition, with the “Select Axis” button user selects a polyline in the drawing to be used as Pathway and gives a name to the selection. The user has to define starting KP of the pathway by giving a KP label at starting point.
POINT TWO: Animation
One option of movement is the Animation where the user has to select a start KP, a finish KP and the duration of the animation or vehicle’s speed. By pressing the play button, the animation begins and the vehicle automatically moves along the selected axis. With pause button or by pressing escape on keyboard the animation pauses. With the move backwards and move forward buttons the vehicle gets drawn in the start and end Kilometric Position respectively. The current position of the vehicle is calculated and written in the corresponding field. Check the option [Leave trace at pen points] in order to create polylines that pass-through vehicle’s pen points.
POINT THREE: Free Move
One option of movement is the Animation where the user has to select a start KP, a finish KP and the duration of the animation or vehicle’s speed. By pressing the play button, the animation begins and the vehicle automatically moves along the selected axis. With pause button or by pressing escape on keyboard the animation pauses. With the move backwards and move forward buttons the vehicle gets drawn in the start and end Kilometric Position respectively. The current position of the vehicle is calculated and written in the textbox below. Check the option “leave trace” in order to create polylines that passes through vehicle’s pen points.
POINT FOUR: Move at given distance
Last option of movement is the move at a given distance. User has to type a positive or negative distance in the field and press the button next to it. ANIMATOR will draw the vehicle at this distance from its current position.
Animator Tutorial Video
Download our products
TSS Animator for AutoCAD 2019-20
TSS Animator for AutoCAD 2017-18
TSS Animator for AutoCAD 2015-16
TSS Animator for AutoCAD 2013-14
TSS Animator for AutoCAD 2012
Version: 201.107
Last Update: 16/09/2022


